Spiral Futomomo

A spiral futomomo tied on a leg. The person is lying on their back with their right leg fully bent and their foot flat on the ground. A single column tie is tied around their ankle. The rope leaves the single column tie and makes three spirals as it goes up the leg. It then connects with itself and comes straight down the crease between the thigh and calf, making a Munter friction each time it crosses itself.

The spiral futomomo is a classic technique in Japanese-inspired bondage. It’s one of several techniques for tying a futomomo—see the ladder futomomo for a completely different approach.

This is a great tie for practicing basic tying techniques like controlling tension and using frictions. It’s also a great way to immobilize the legs. We love it for oral sex but find it awkward for penetration.

Step by step

A person in a white bodysuit is lying on their back with their right knee fully bent and their foot flat on the ground. A single column tie is tied around their ankle, with the tail of the rope pulled up toward their body and crossing the thigh just below the hip.

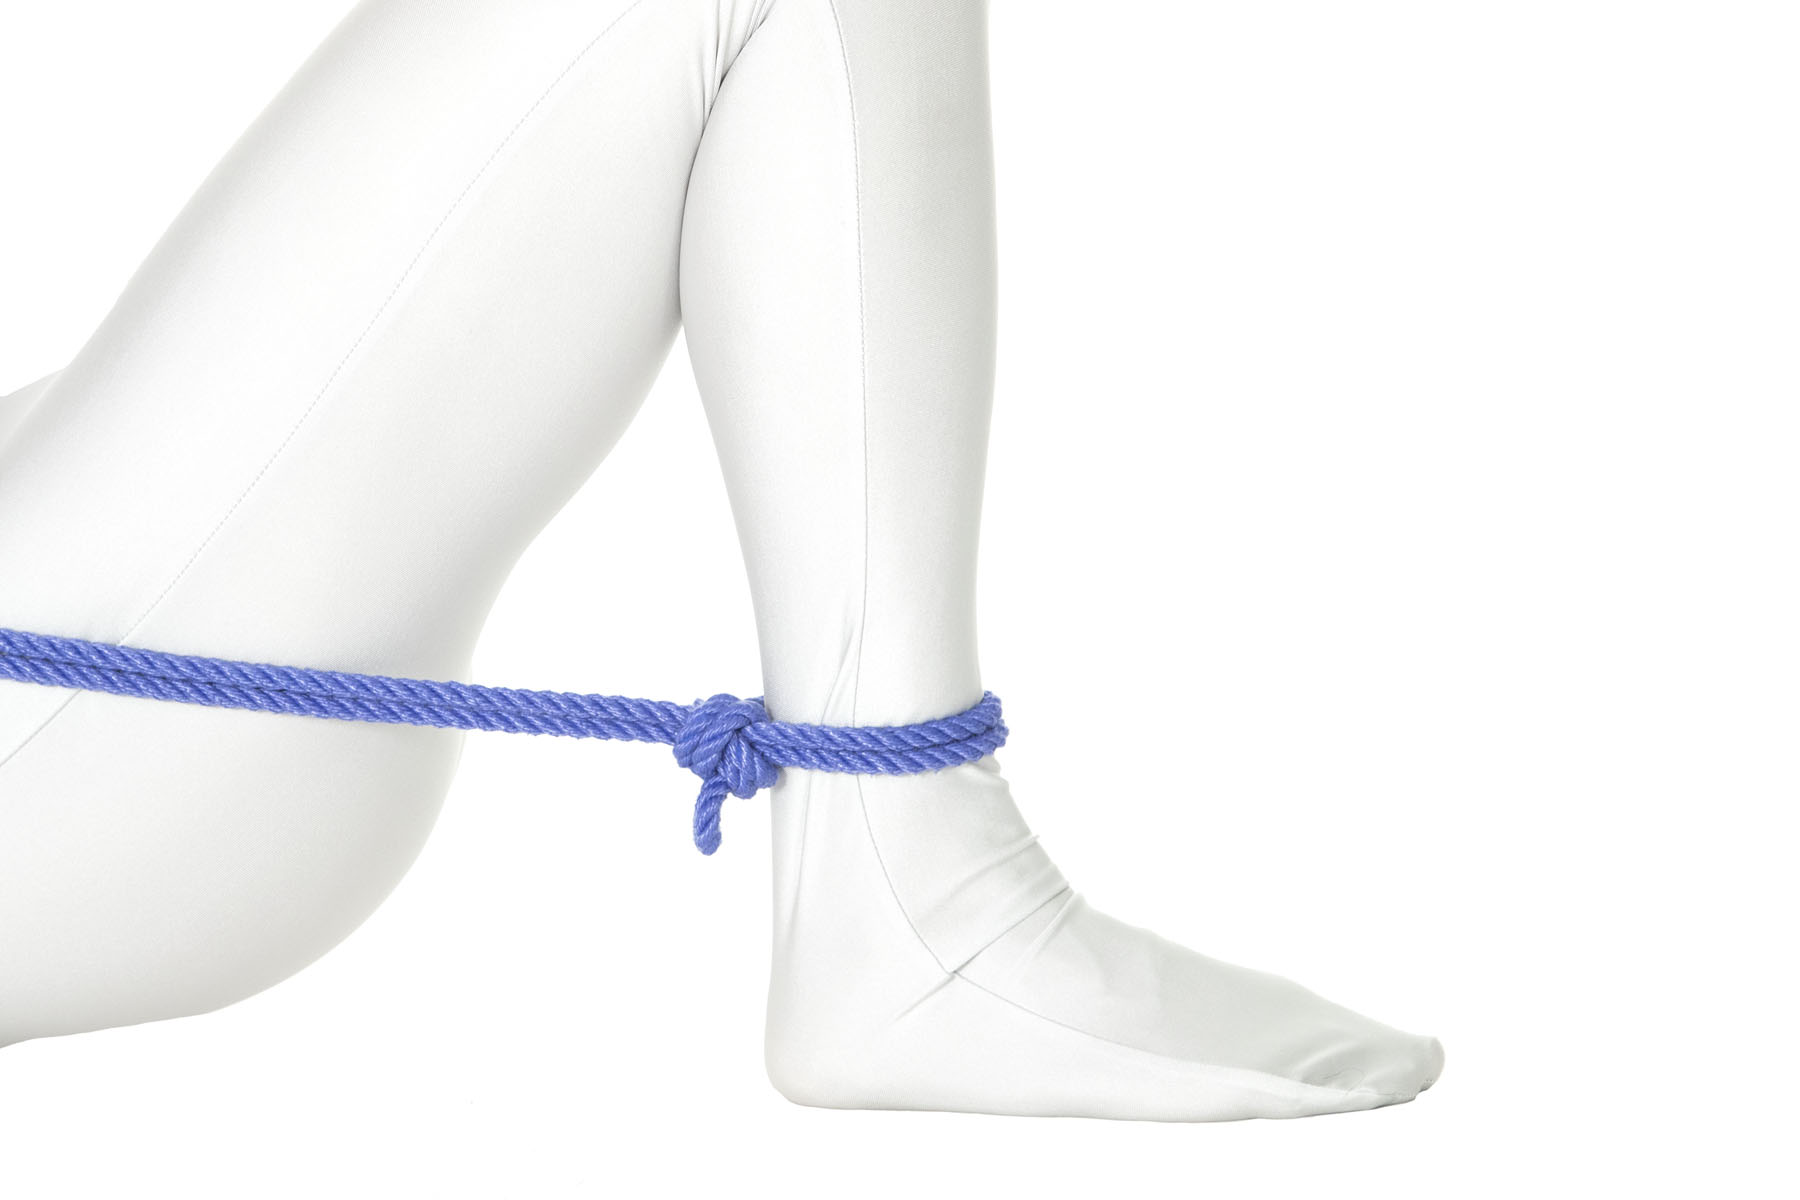
1Tie a column tie around the ankle.

We prefer a single wrap for this column tie.

The rope is beginning to spiral up the leg, binding the thigh and calf together. It has now made one full clockwise spiral. The rope comes around the shin about three inches above the single column tie.

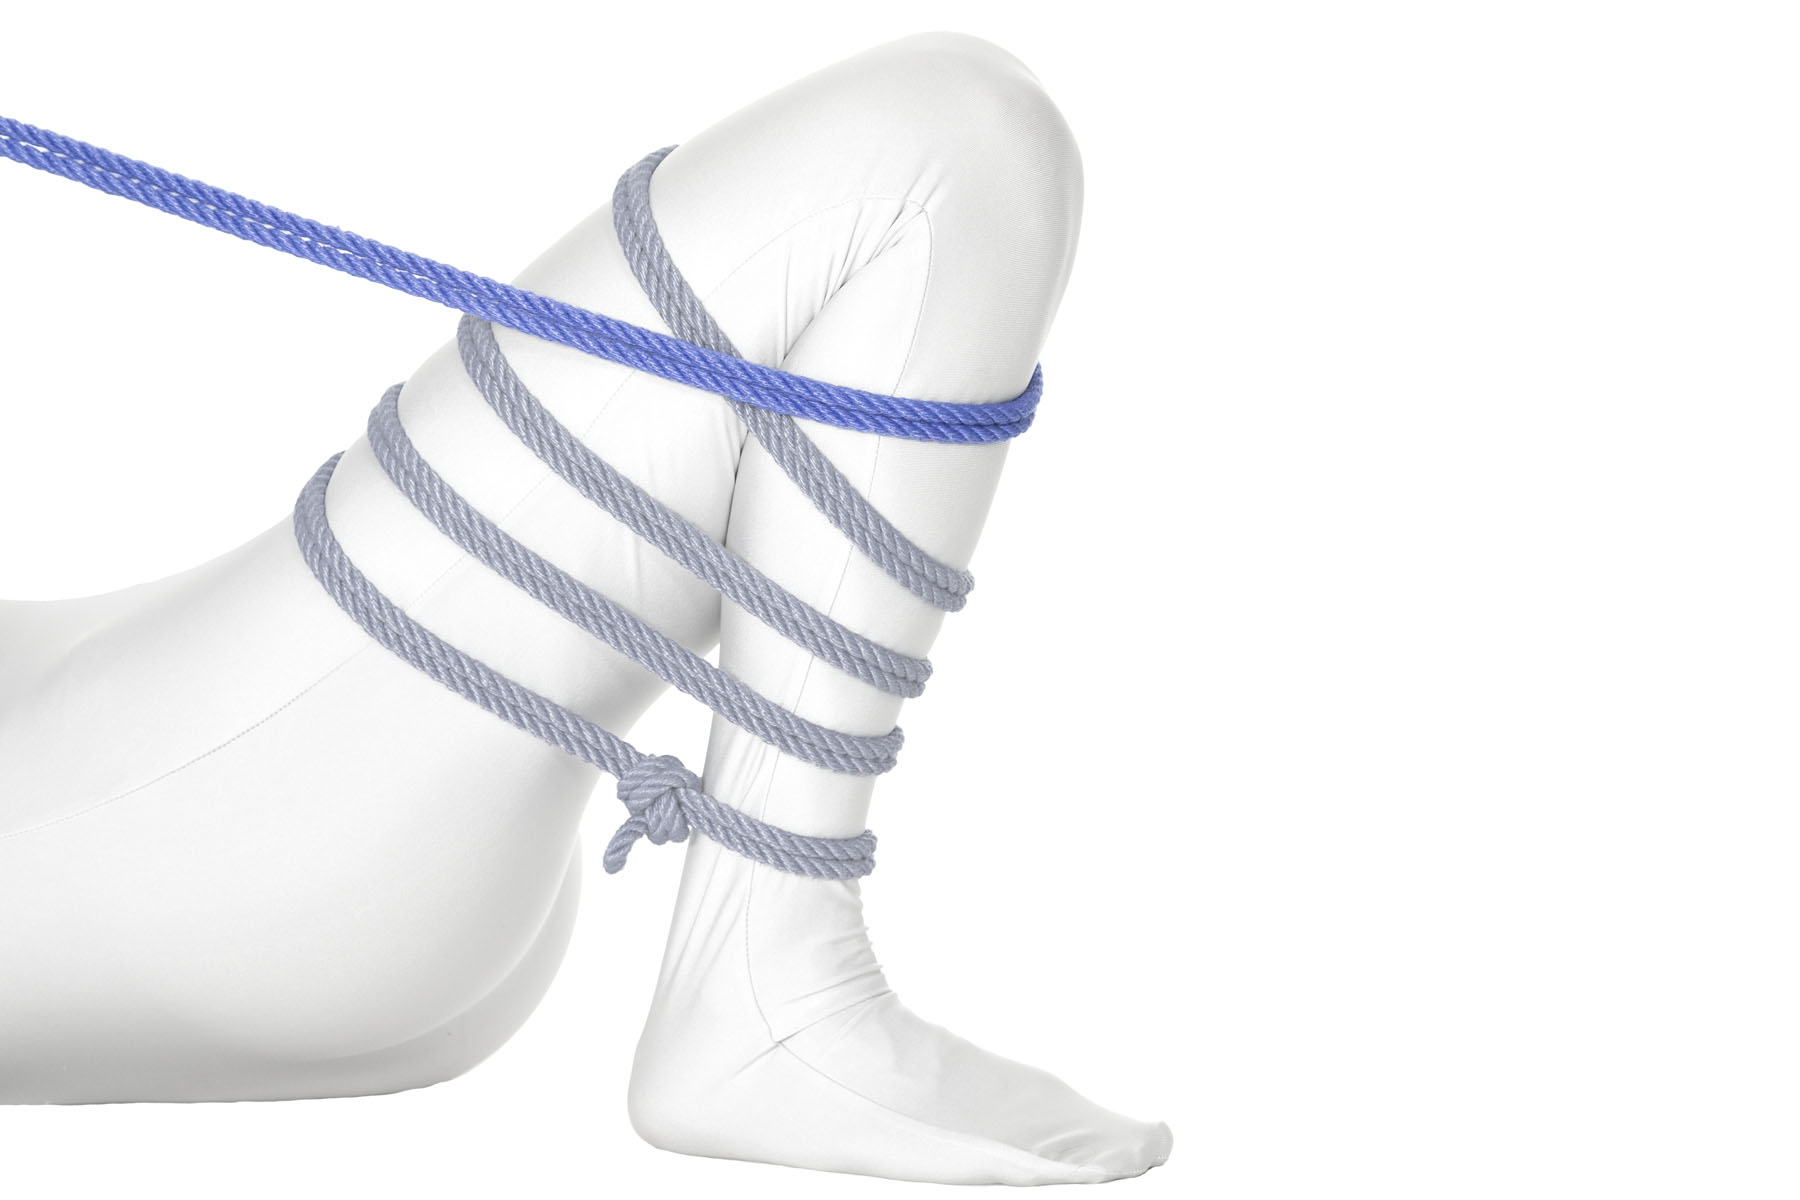
2Make a spiral wrap around the thigh and calf.

The rope makes two more complete spirals up the leg, each about three inches above the previous one. The third spiral should be about two thirds of the way up the leg.

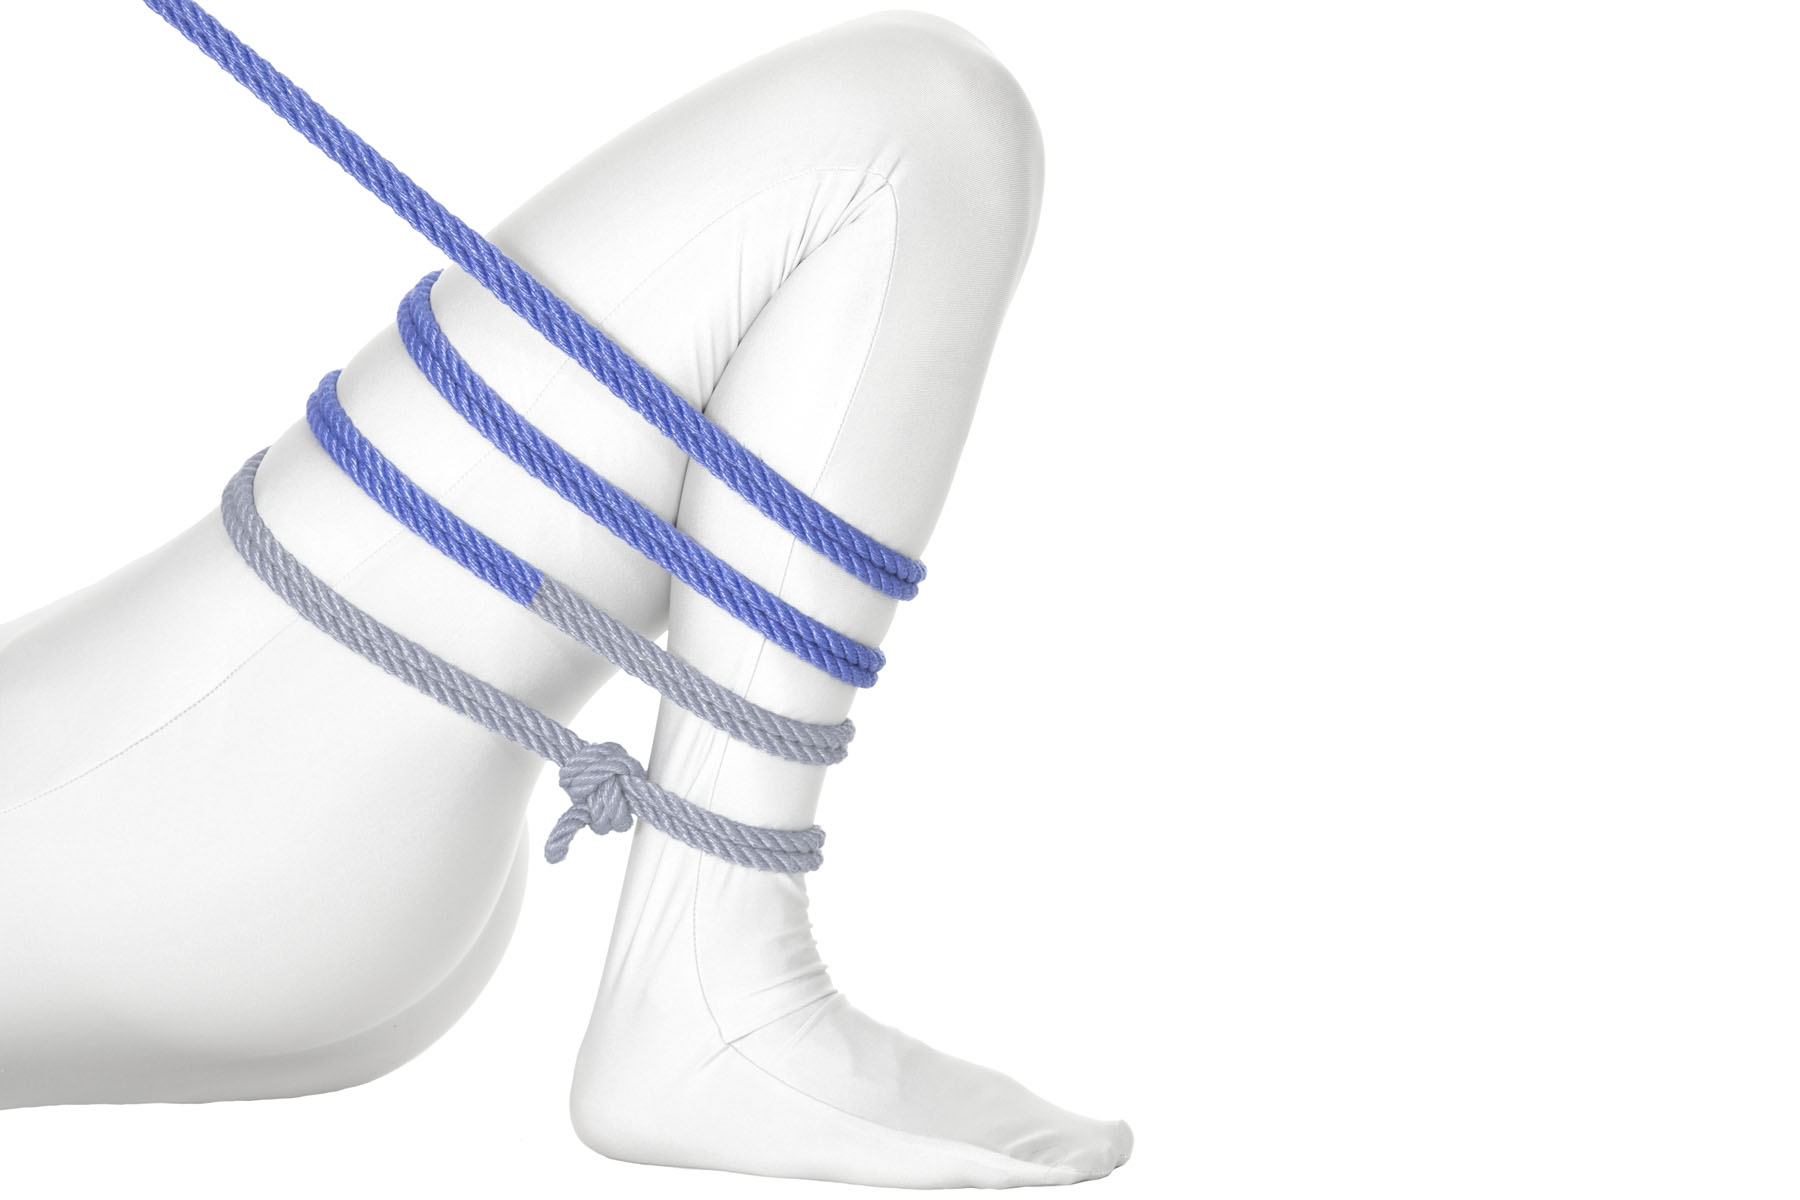
3Make two more spiral wraps, ending up two thirds of the way up the leg.

Going closer to the knee makes the futomomo more effective but harder to tie.

The rope makes one more complete clockwise wrap around the leg. This wrap is horizontal, so when it gets back to the outside of the leg it crosses itself over the crease between the thigh and shin.

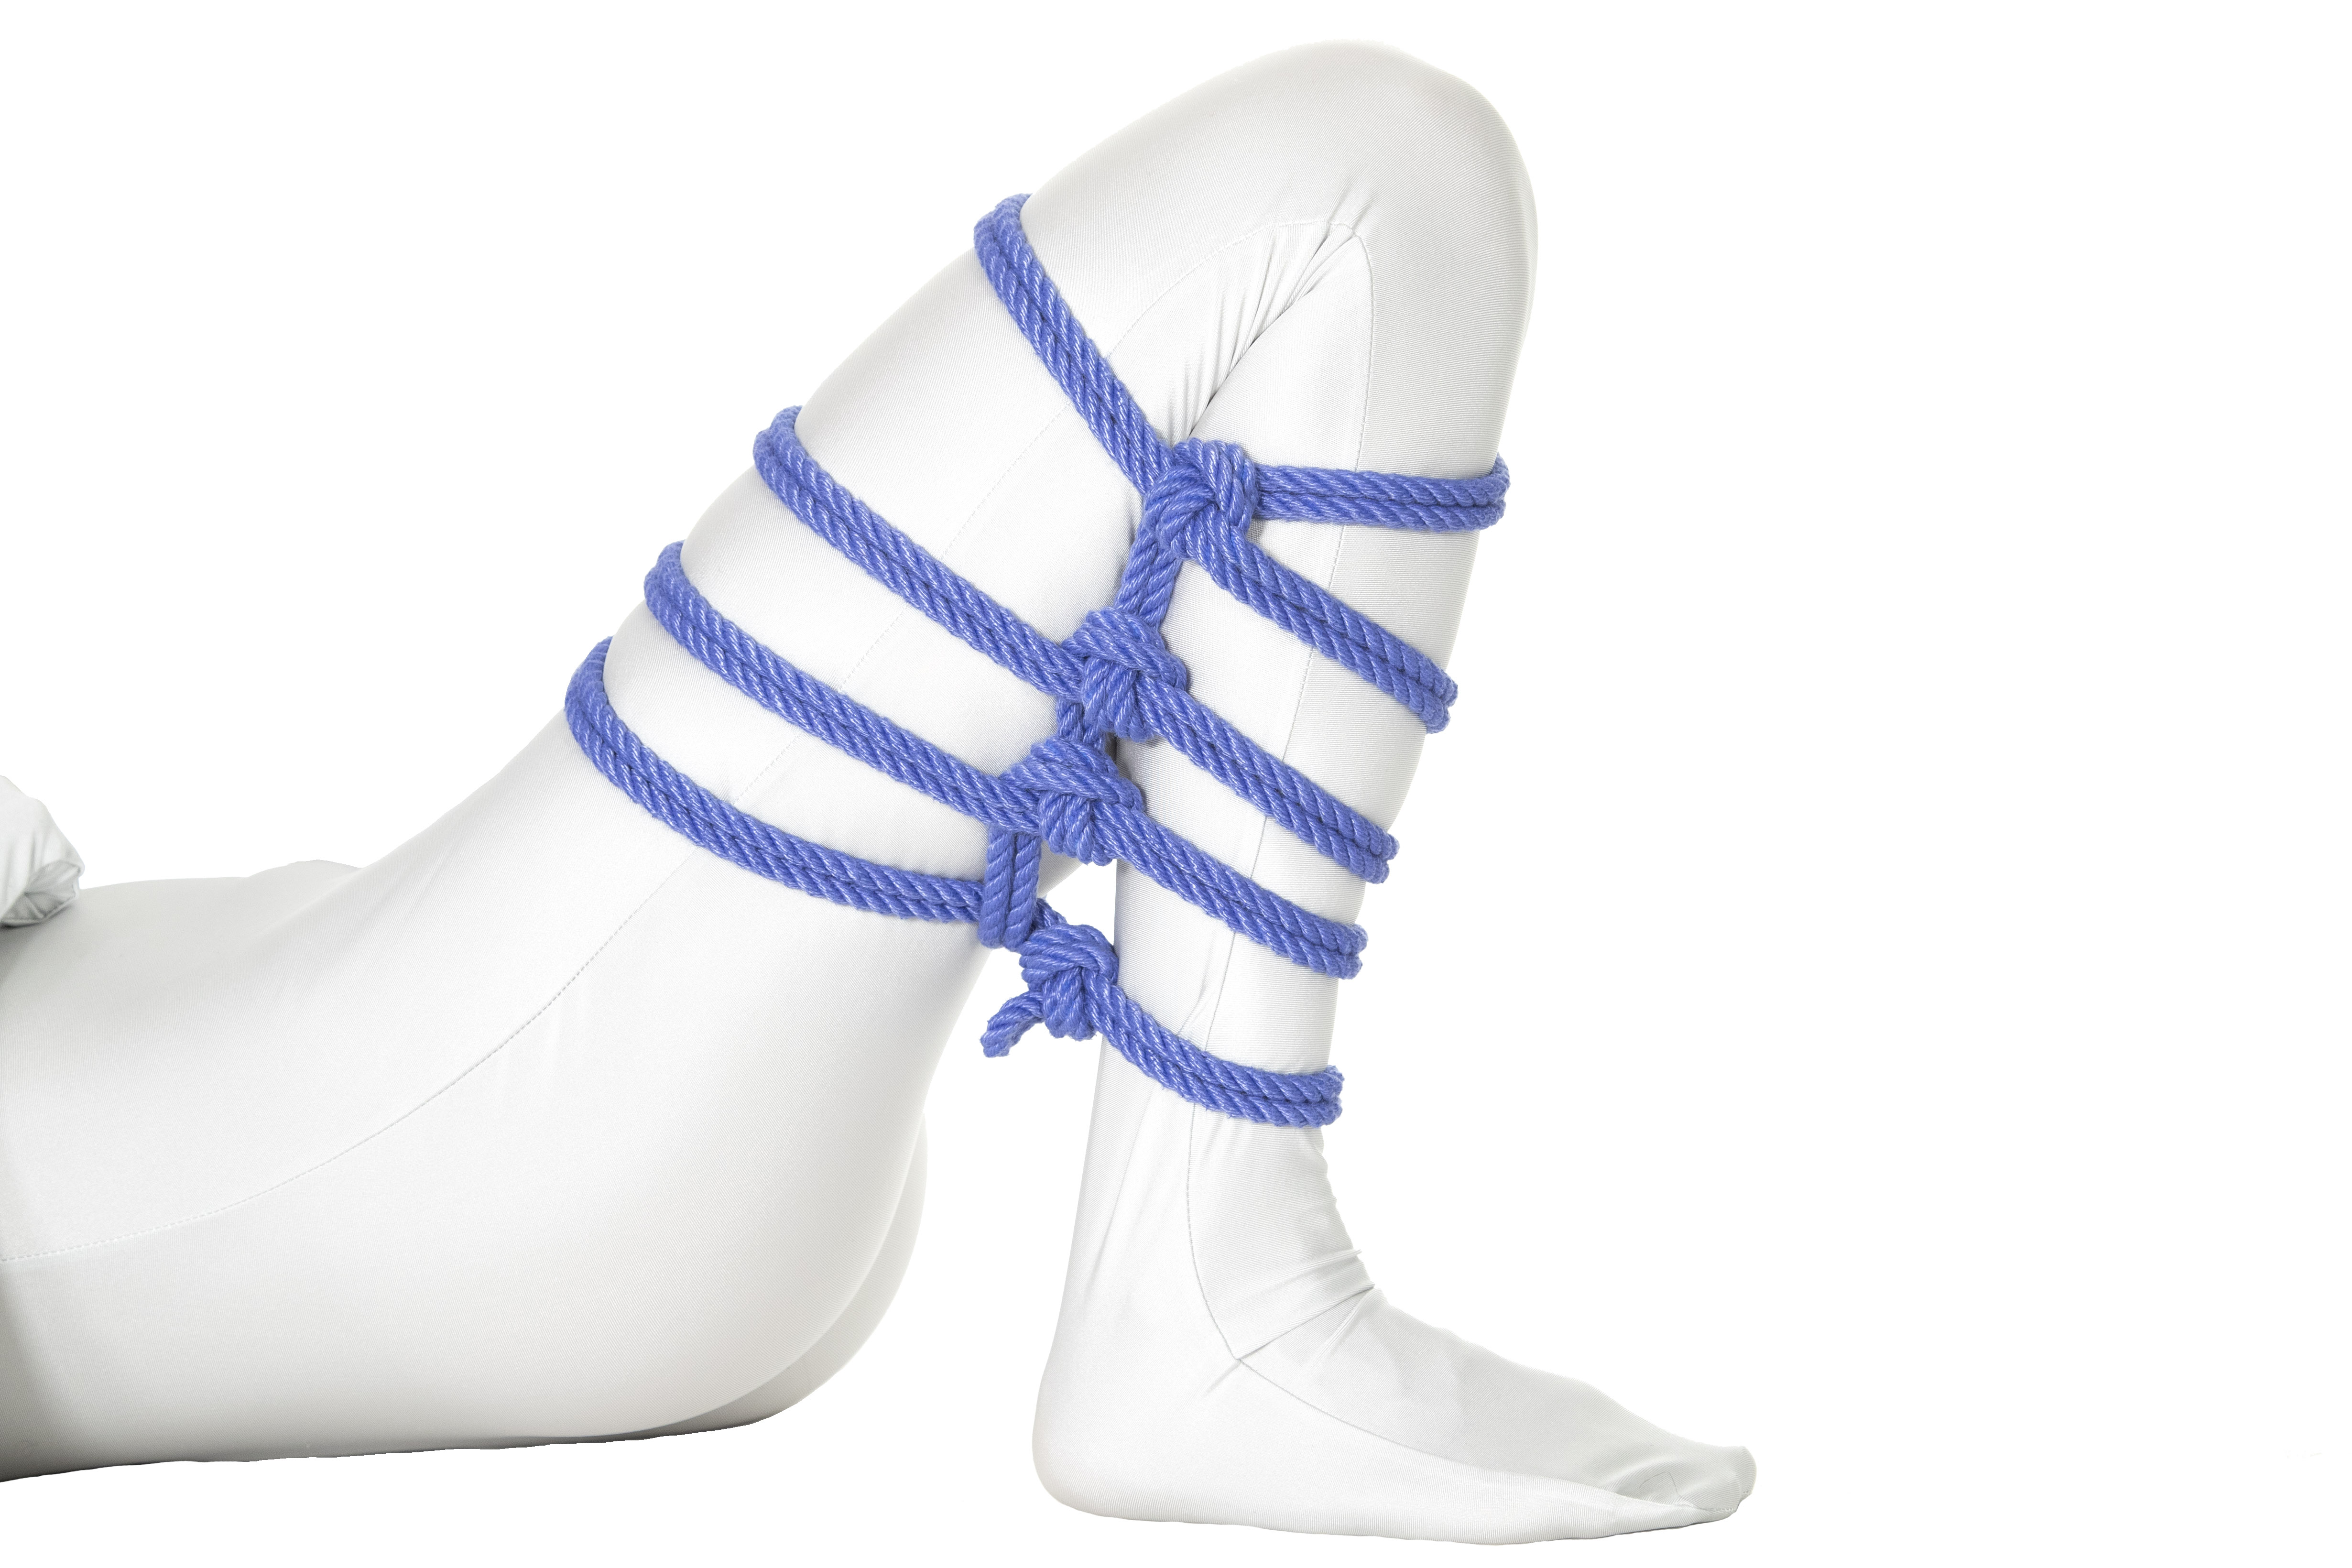
4Make a final horizontal wrap around the leg, crossing itself at the crease between the thigh and calf.

The rope makes a Munter friction where it crosses itself.

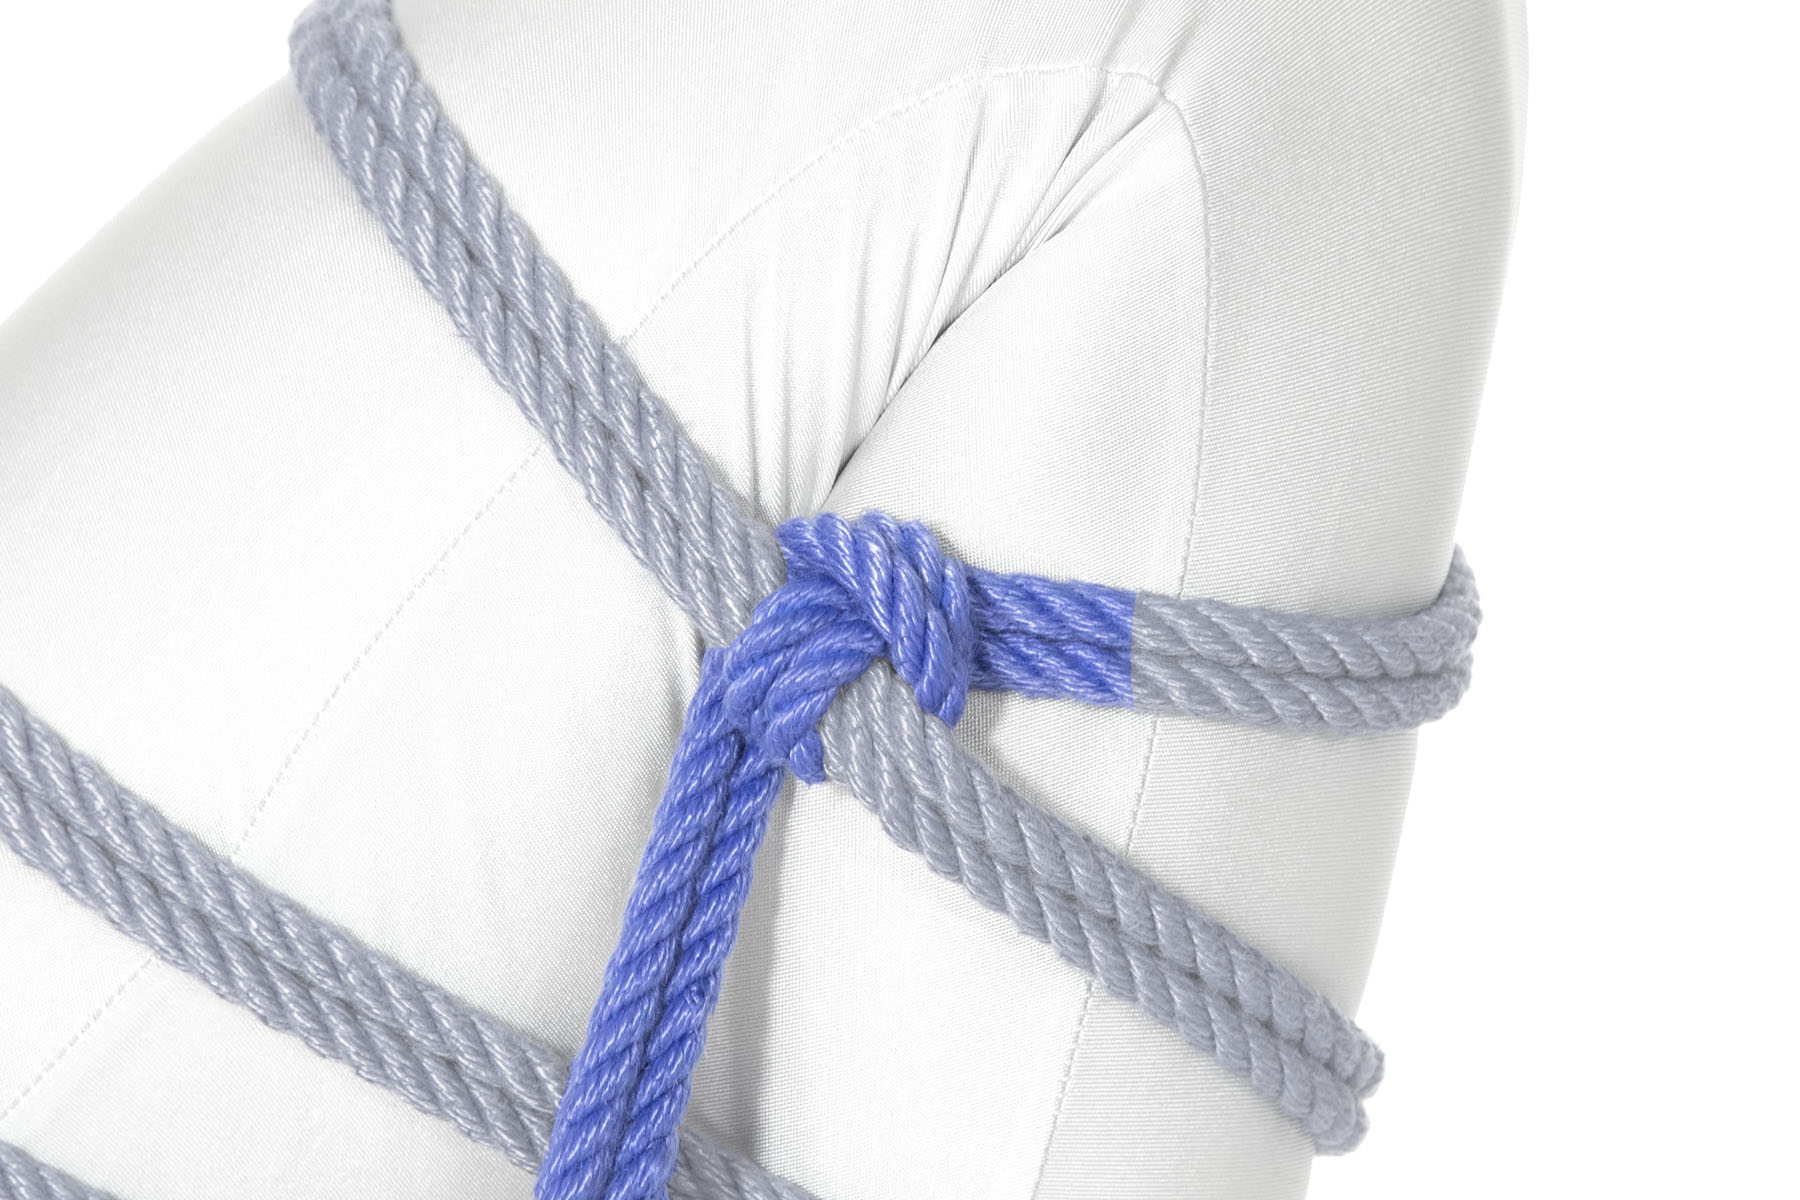
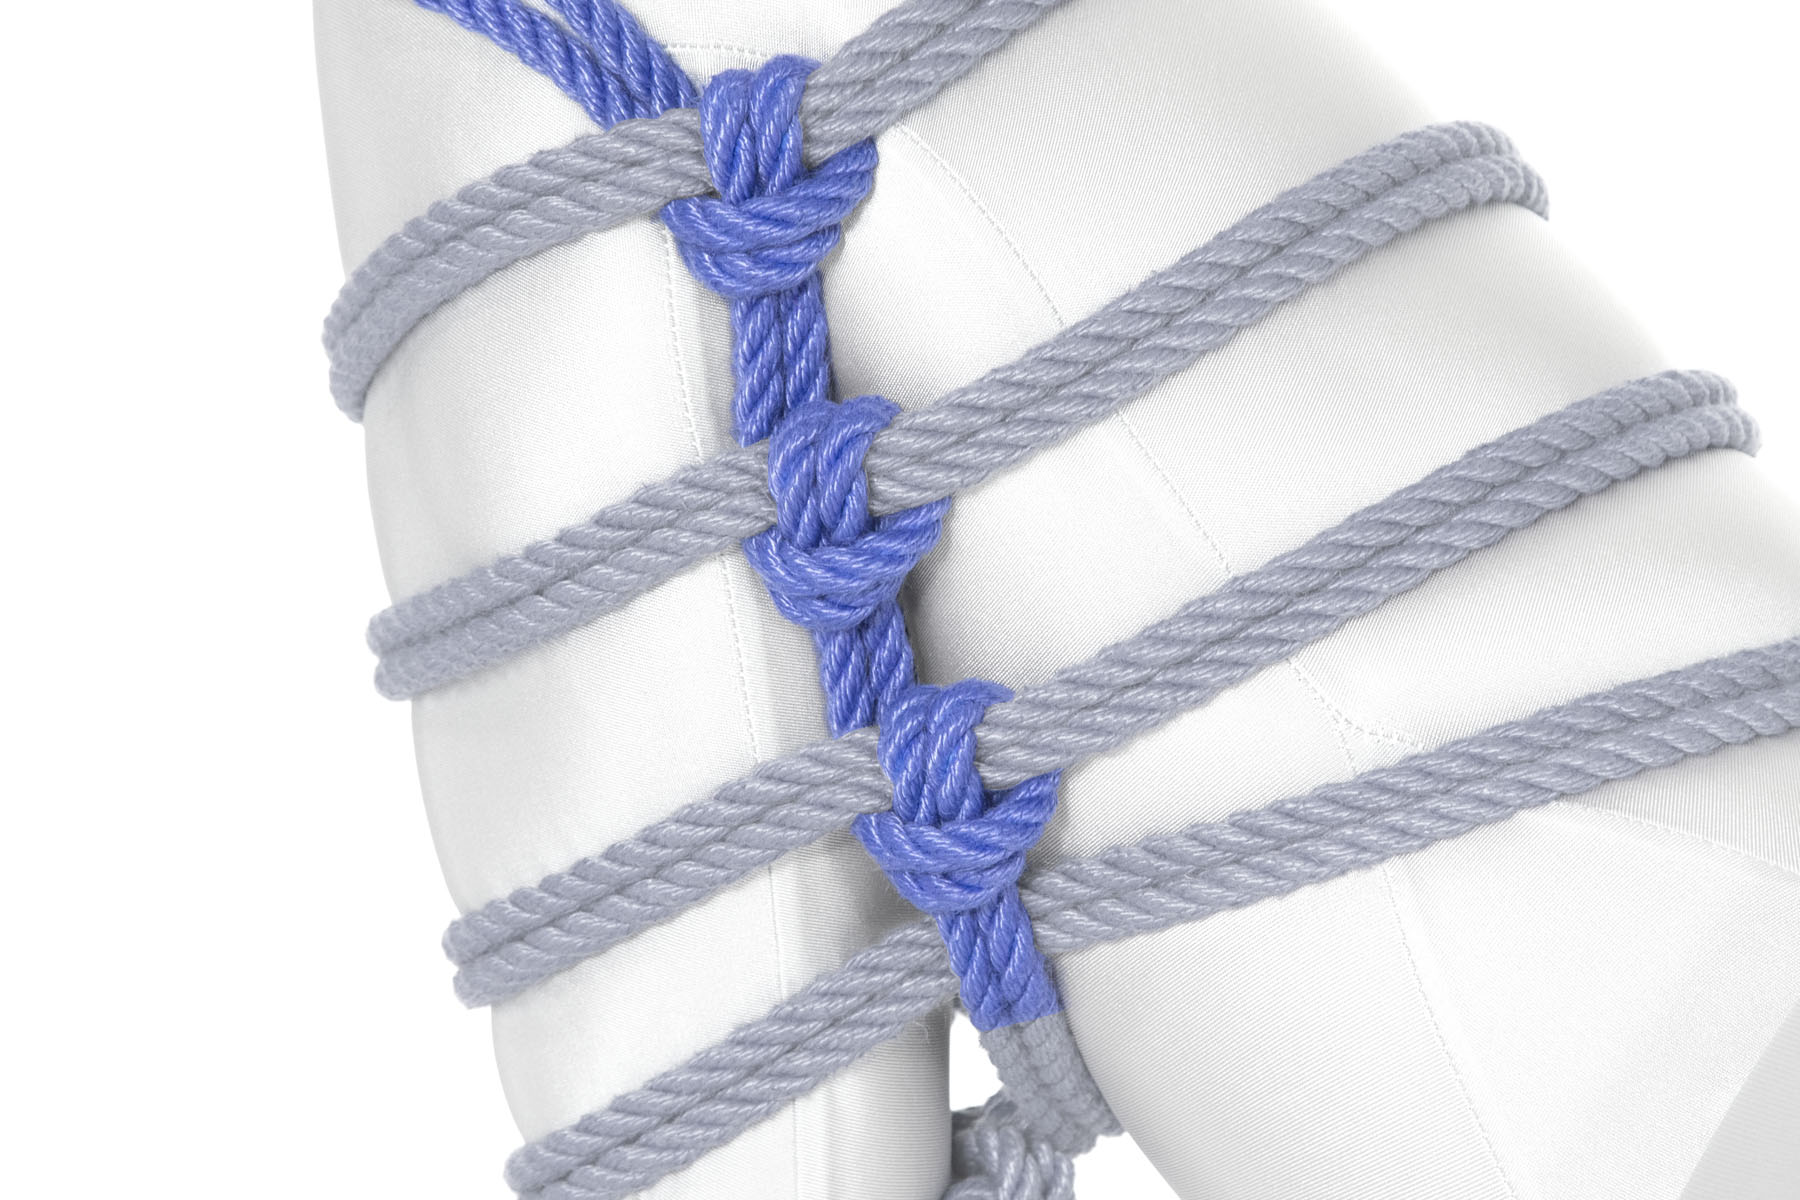
5Make a Munter friction where the lines cross.

We’re headed straight down, so it doesn’t matter if you begin the Munter on the left or the right.

The rope goes straight down the crease between the thigh and shin. It crosses itself twice more, making a Munter friction each time. It does not make a Munter at the single column tie.

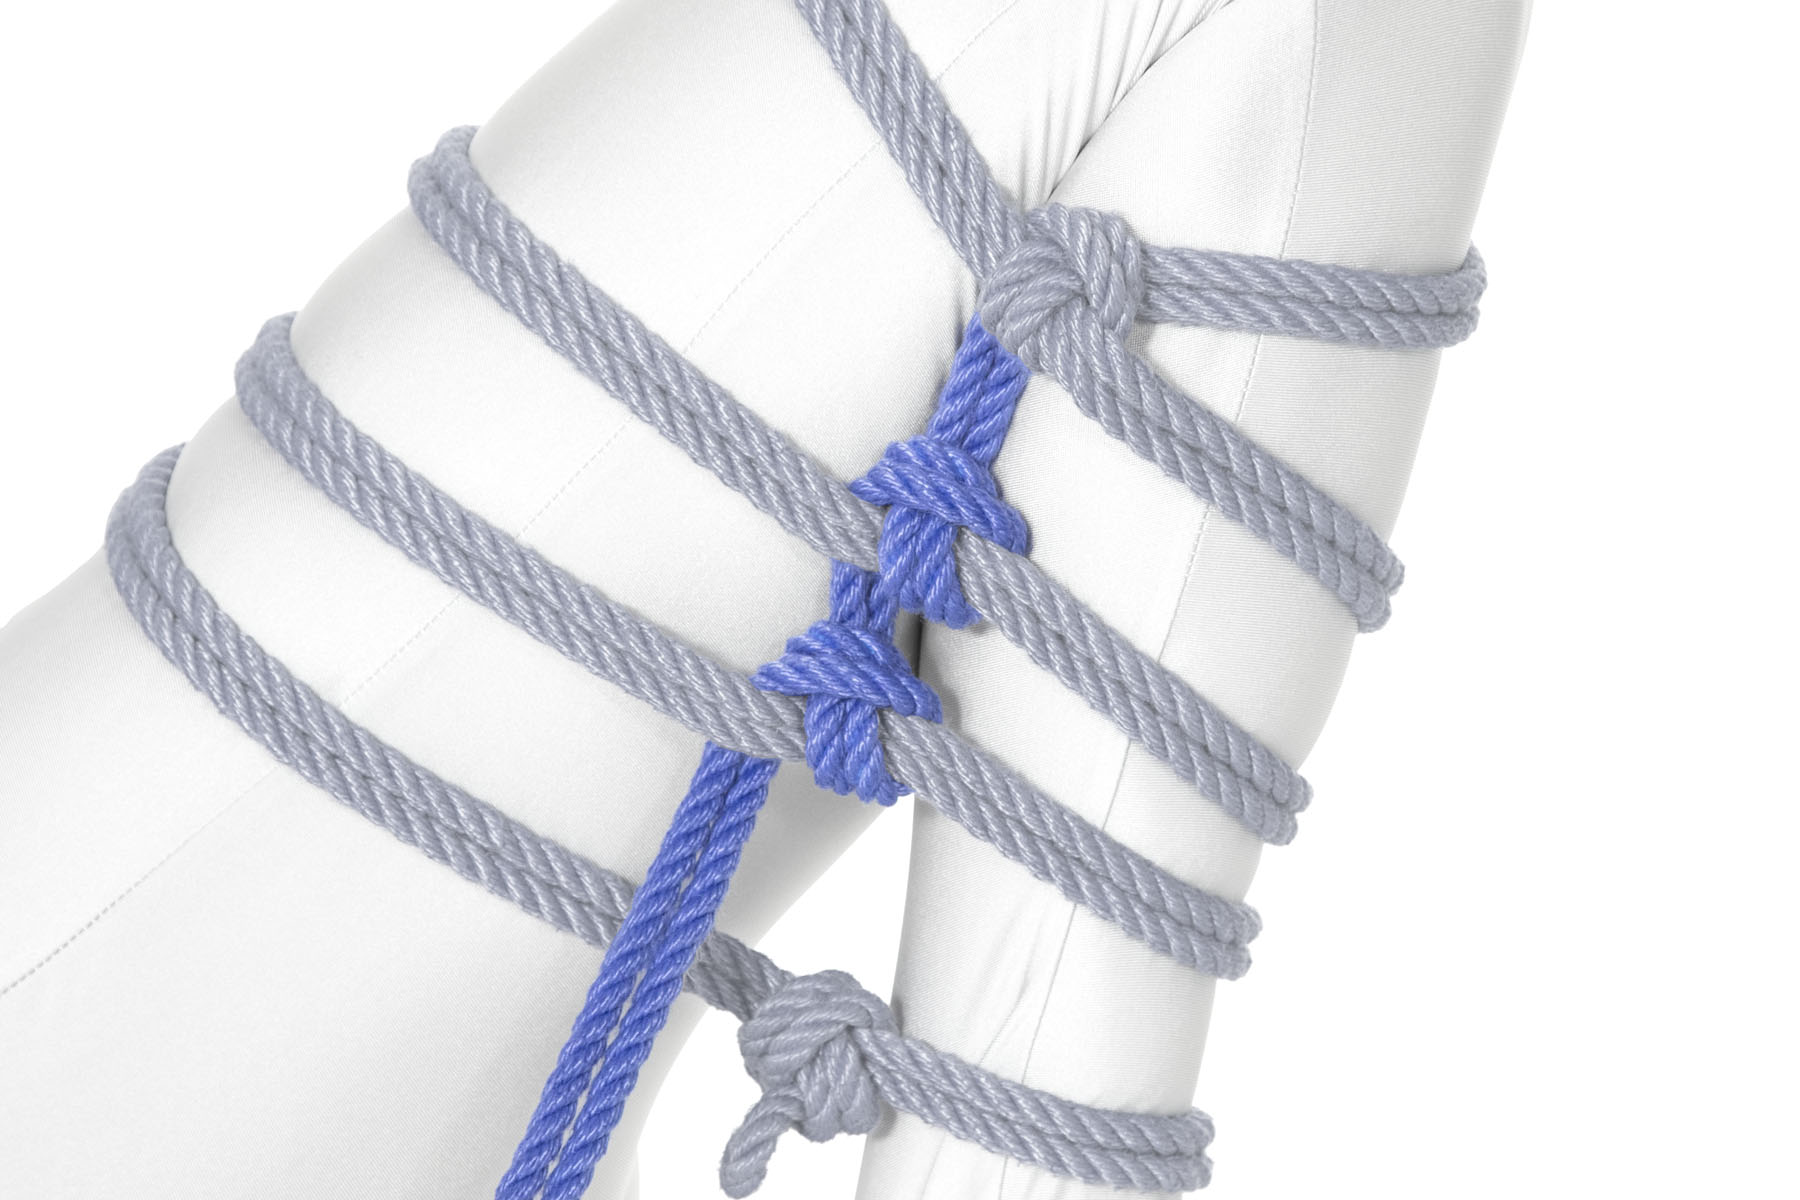
6Go straight down the leg, making two more Munters where you cross the spiral wraps.

It’s more comfortable and attractive to stay right over the crease between the thigh and calf.

The rope crosses over the lowest wrap, right next to the single column tie. It turns inward and goes between the thigh and calf.

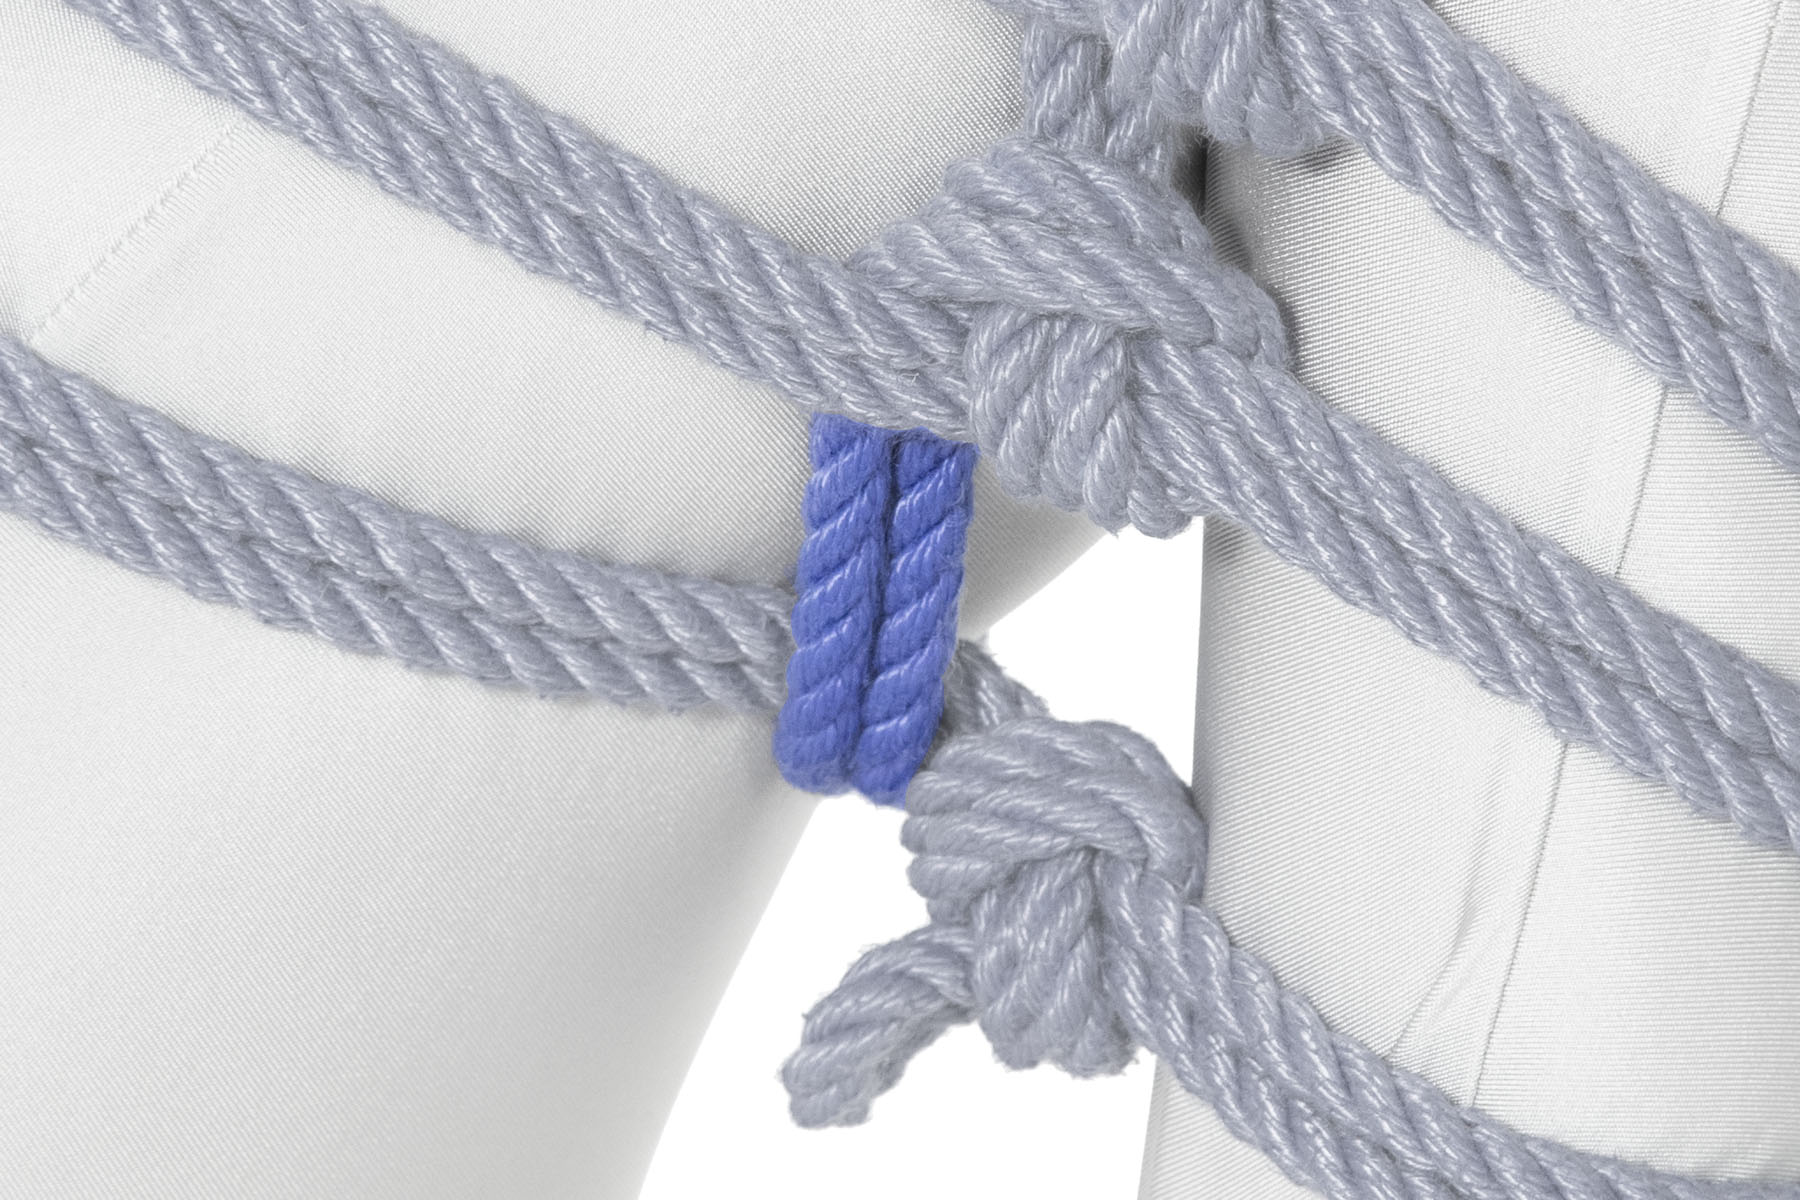
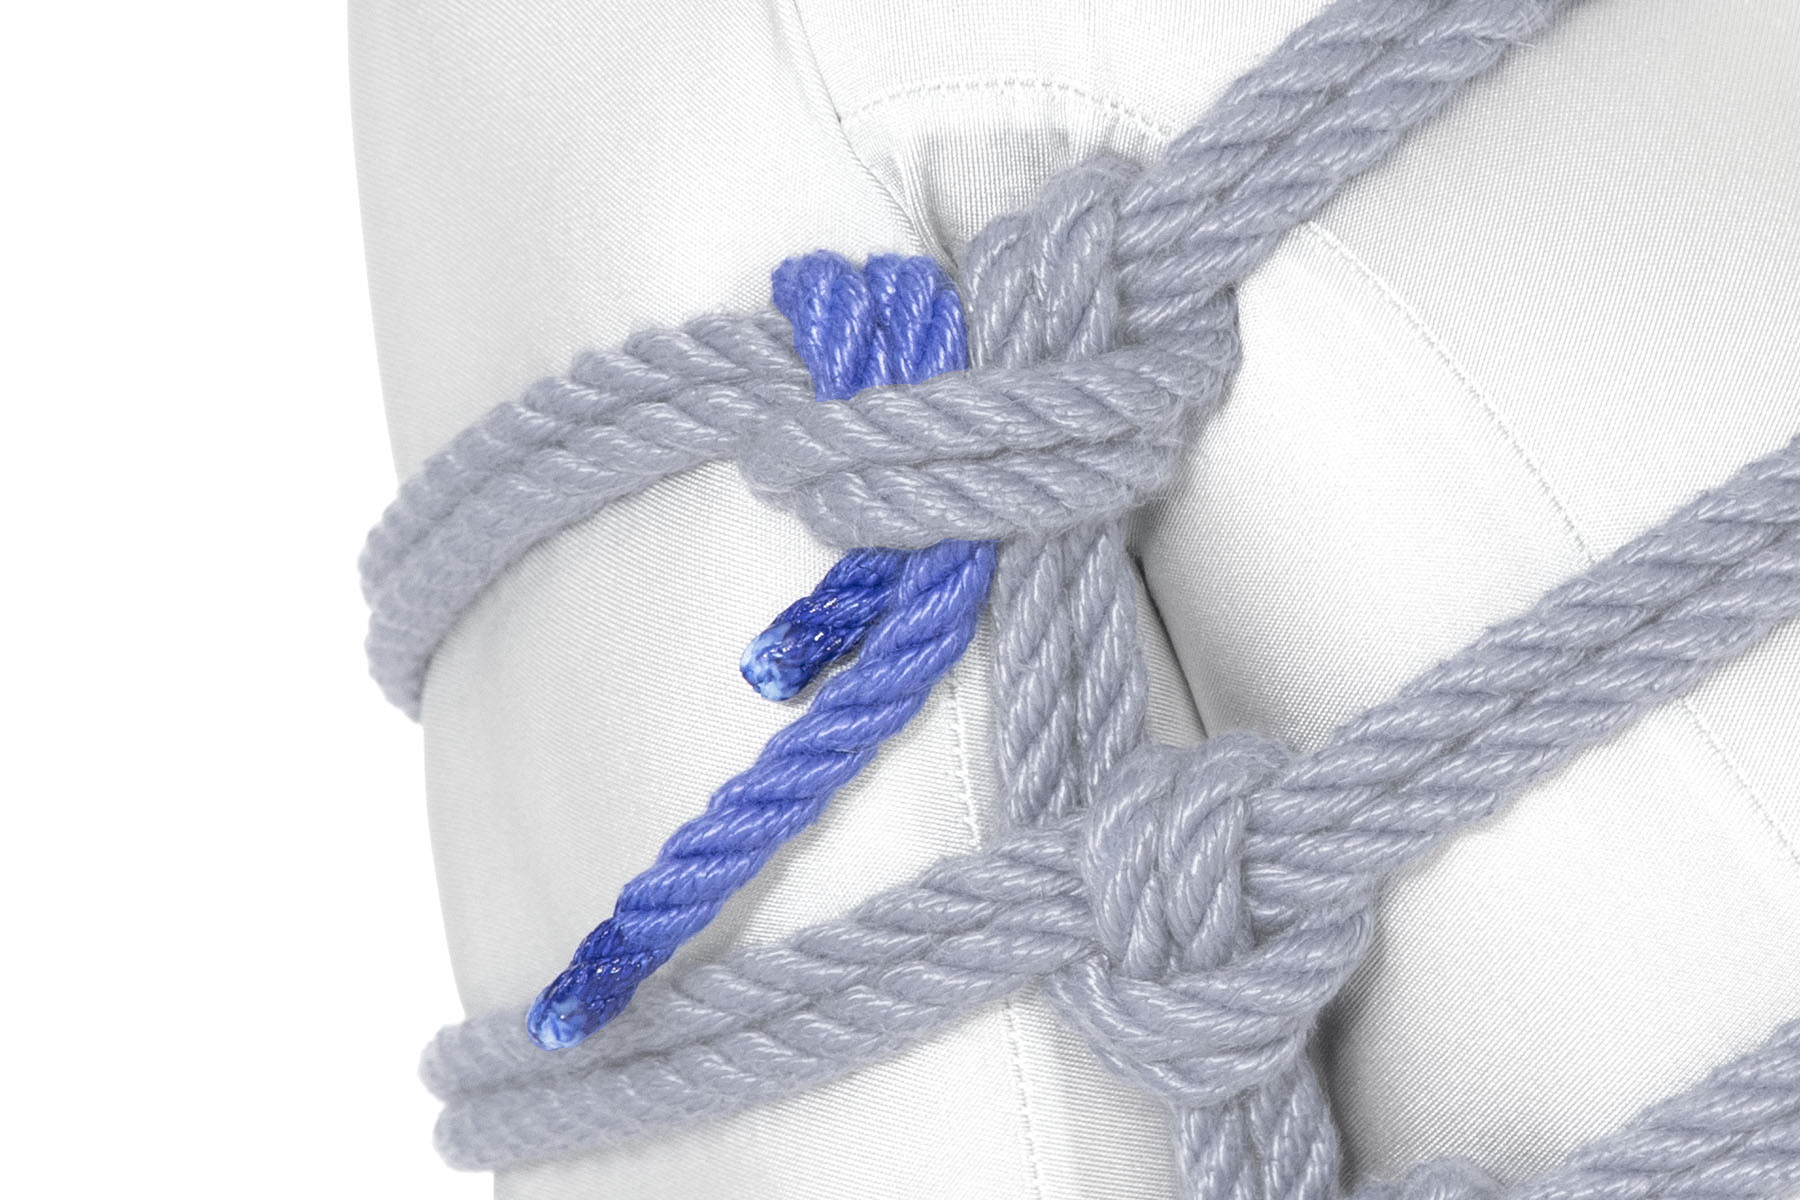
7Make a 90° bend at the the bottom line and go between the thigh and calf to the inside of the leg.

Be sure not to leave any slack in the rope.

The rope comes out on the inside of the leg and turns upward, crossing over the bottom wrap.

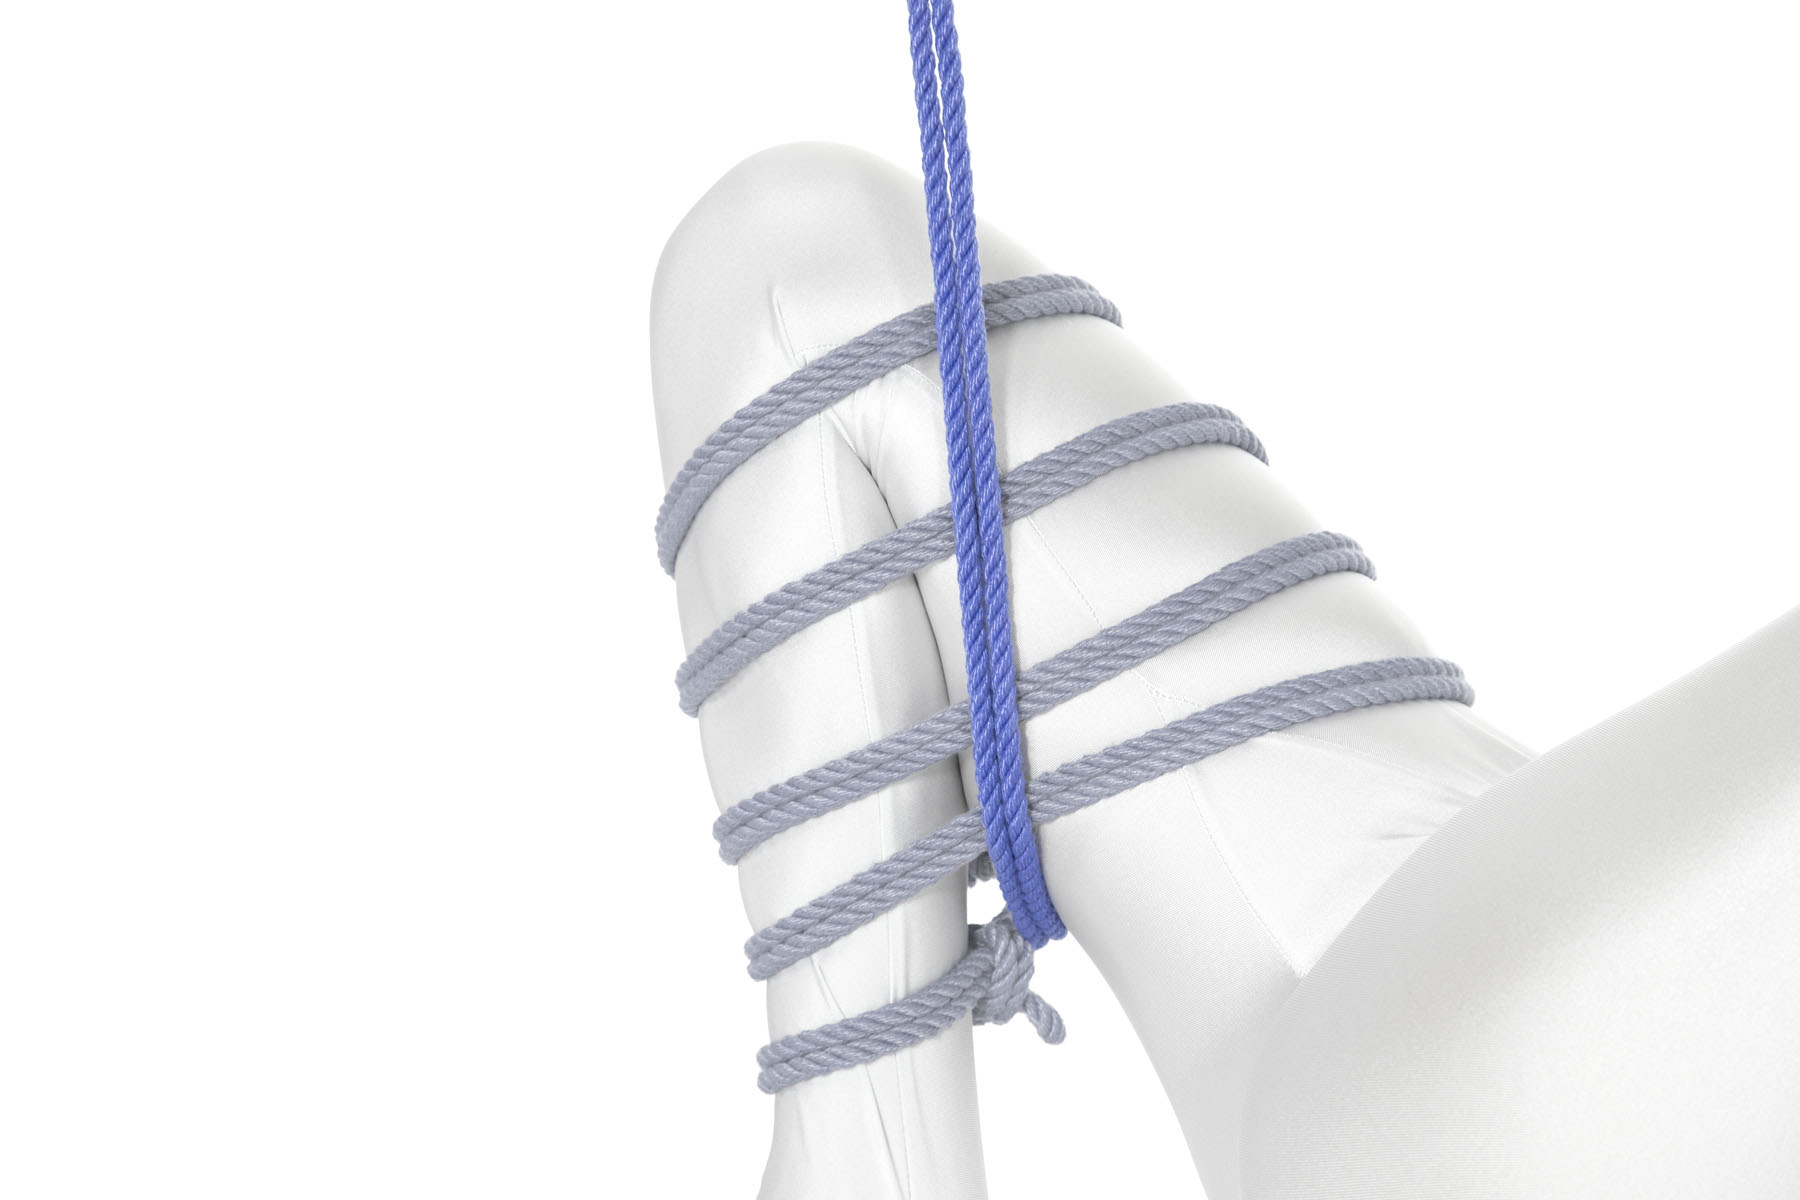
8Make another 90° bend at the bottom line and start going up the inside of the leg.

The rope travels up the crease between the thigh and shin, making three Munter frictions as it crosses itself.

9Continue up the inside of the leg, tying a Munter at each subsequent wrap.

The rope makes a half hitch after the final Munter, securing itself to the upper wrap.

10Secure the final Munter with a half hitch.

0

This work is licensed under a Creative Commons Attribution-ShareAlike 4.0 International License.